What Is The Function Of The Microscope Diaphragm
Holbox
Mar 09, 2025 · 7 min read
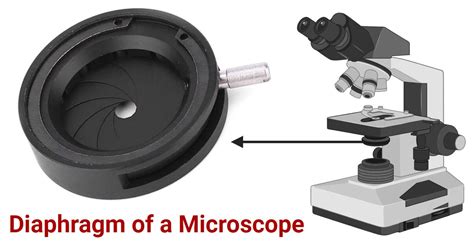
Table of Contents
What is the Function of the Microscope Diaphragm? A Comprehensive Guide
The microscope diaphragm, a seemingly small component, plays a crucial role in achieving optimal image quality and maximizing the potential of your microscope. Understanding its function is key to mastering microscopy techniques and obtaining clear, high-contrast images. This comprehensive guide will delve into the intricacies of the microscope diaphragm, exploring its purpose, types, how it affects image quality, and best practices for its usage.
Understanding the Role of Light in Microscopy
Before we explore the diaphragm, let's establish the fundamental importance of light in microscopy. Microscopy relies on the interaction of light with the specimen to create a magnified image. The amount, direction, and quality of light significantly impact the clarity and detail of the observed specimen. This is where the diaphragm steps in as a crucial light control mechanism.
Controlling Light Intensity and Contrast
The primary function of the microscope diaphragm is to regulate the amount of light reaching the specimen. By adjusting the aperture of the diaphragm, the microscopist can control the intensity of the light illuminating the sample. This is critical for several reasons:
-
Optimizing Illumination: Too much light can lead to a washed-out, overexposed image, obscuring details and reducing contrast. Too little light results in a dim, poorly resolved image. The diaphragm allows for precise adjustment to achieve the ideal illumination level for the specimen and objective lens being used.
-
Enhancing Contrast: Controlling light intensity directly impacts contrast. By reducing the amount of light, the diaphragm increases the difference in brightness between different parts of the specimen, making it easier to distinguish features and structures. This is particularly important when observing specimens with subtle differences in refractive index.
-
Minimizing Glare and Stray Light: Excessive light can create glare and scattering, which can interfere with image quality. The diaphragm helps to reduce this stray light, resulting in a cleaner, sharper image.
-
Adjusting Depth of Field: The diaphragm's effect on light intensity also influences the depth of field – the distance along the optical axis that remains in sharp focus. A smaller diaphragm aperture can increase the depth of field, useful for viewing thick specimens. Conversely, a larger aperture might be preferred for observing thin specimens where a shallow depth of field can provide better resolution.
Types of Microscope Diaphragms
Microscopes employ different types of diaphragms, each with its unique characteristics and functionalities. The most common types include:
1. Field Diaphragm
Located at the base of the condenser, the field diaphragm controls the diameter of the light beam entering the condenser. It is primarily used to adjust the size of the illuminated area on the specimen. Proper adjustment of the field diaphragm ensures that only the area of interest is illuminated, preventing unnecessary glare and improving image contrast.
How to Adjust the Field Diaphragm: The field diaphragm is typically controlled by a lever or a set of screws located on the condenser itself. The proper adjustment is crucial – a fully open field diaphragm may lead to glare, while a diaphragm that is too closed may restrict the amount of light needed for optimal image resolution.
2. Aperture Diaphragm (Condenser Diaphragm)
Situated within the condenser, the aperture diaphragm regulates the angle of the light cone that illuminates the specimen. This differs fundamentally from the field diaphragm which controls the area illuminated. By altering the aperture, the microscopist controls the numerical aperture (NA) of the condenser, which is directly related to the resolution and contrast of the image.
How to Adjust the Aperture Diaphragm: The aperture diaphragm is typically controlled by a lever or a ring on the condenser. Improper adjustment can lead to a loss of resolution or an increase in artifacts and aberrations in the image. Accurate adjustment is crucial to achieving optimal image quality.
3. Iris Diaphragm
Many microscopes utilize an iris diaphragm, a type of aperture diaphragm that uses a series of overlapping metal plates to control the aperture size. The iris diaphragm allows for fine, continuous adjustment of the light cone, providing a high level of control over the illumination.
4. Disc Diaphragm
Some simpler microscopes, particularly older models, might incorporate a disc diaphragm. This uses a rotating disc with various sized holes. Each hole represents a different aperture setting, offering a more limited range of adjustment compared to iris diaphragms.
The Impact of Diaphragm Adjustment on Image Quality
The precise adjustment of both the field and aperture diaphragms is essential for achieving optimal image quality. Improper adjustment can lead to several issues:
-
Reduced Resolution: An improperly adjusted aperture diaphragm can significantly reduce the resolution of the image, making details blurry and indistinct.
-
Poor Contrast: An incorrectly set diaphragm can lead to low contrast images making details difficult to distinguish.
-
Increased Aberrations: An improperly set aperture diaphragm might introduce or exacerbate optical aberrations, further degrading the image quality.
-
Uneven Illumination: An incorrectly adjusted field diaphragm can lead to uneven illumination of the sample, causing some areas to be brighter than others.
Best Practices for Diaphragm Usage
To obtain the best results, follow these guidelines for utilizing the microscope diaphragms:
-
Start with the Field Diaphragm: Begin by adjusting the field diaphragm to illuminate only the area of interest on the specimen. The illuminated area should be slightly larger than the field of view of the objective lens.
-
Adjust the Aperture Diaphragm Carefully: Adjust the aperture diaphragm to achieve optimal contrast and resolution. A common method is the Köhler illumination technique which ensures even illumination and enhances image quality significantly.
-
Observe the Diffraction Pattern: As you adjust the aperture diaphragm, you'll notice a diffraction pattern in the image. The ideal setting is usually found when the diffraction pattern is slightly visible, but not overwhelmingly prominent. The optimal setting varies depending on the objective lens's numerical aperture (NA).
-
Experiment and Observe: The ideal diaphragm settings depend on the specific specimen, objective lens, and lighting conditions. Experimentation and observation are crucial to finding the optimal configuration for each scenario.
-
Document Your Settings: Once you've determined the optimal settings for a particular specimen and objective, it's beneficial to document these settings for future reference.
Troubleshooting Common Issues
If you're encountering problems with your microscope images, here are some troubleshooting tips:
-
Low Contrast: Check if the aperture diaphragm is too open. Try closing it gradually until you achieve satisfactory contrast.
-
Poor Resolution: Check if the aperture diaphragm is too closed. Try opening it gradually until the resolution improves.
-
Uneven Illumination: Ensure the field diaphragm is adjusted to illuminate only the area of interest.
-
Glare and Stray Light: Both field and aperture diaphragm adjustments may need optimization to mitigate glare and stray light.
Advanced Techniques and Considerations
For advanced microscopy techniques, understanding and manipulating the diaphragms become even more crucial.
-
Köhler Illumination: A critical technique for setting up the microscope, optimizing contrast and resolving power and ensuring even illumination of the field of view. Köhler illumination requires careful adjustment of both the field and aperture diaphragms.
-
Phase-Contrast Microscopy: In phase contrast microscopy, the diaphragms play a vital role in controlling the contrast between different refractive indices in the specimen, enabling visualization of transparent structures.
-
Darkfield Microscopy: Darkfield microscopy utilizes a specialized condenser and diaphragm setup to produce images with a dark background and brightly illuminated specimens.
-
Fluorescence Microscopy: Diaphragm adjustments are crucial for optimal excitation and emission light paths in fluorescence microscopy.
Conclusion: Mastering the Microscope Diaphragm
The microscope diaphragm, while seemingly a small component, is a critical tool for achieving high-quality microscopic images. Understanding its function, the different types of diaphragms, and best practices for their usage is crucial for any microscopist. Through careful adjustment, microscopists can significantly enhance image clarity, contrast, and resolution, unlocking the full potential of their microscopy work. By mastering diaphragm adjustments, you'll elevate your microscopy skills and obtain consistently superior results, leading to more accurate observations and discoveries. Remember, practice and careful observation are key to developing proficiency in using the microscope diaphragm effectively.
Latest Posts
Latest Posts
-
Stories About St Michael The Archangel
Mar 09, 2025
-
Is Jello A Liquid Or Solid
Mar 09, 2025
-
Volume Flow Rate To Mass Flow Rate
Mar 09, 2025
-
Nursing Diagnosis For Patient With Sepsis
Mar 09, 2025
-
How Do You Calculate Percent Recovery
Mar 09, 2025
Related Post
Thank you for visiting our website which covers about What Is The Function Of The Microscope Diaphragm . We hope the information provided has been useful to you. Feel free to contact us if you have any questions or need further assistance. See you next time and don't miss to bookmark.
