Use The Protractor To Determine Which Of The Following Rotations
Holbox
Mar 18, 2025 · 5 min read
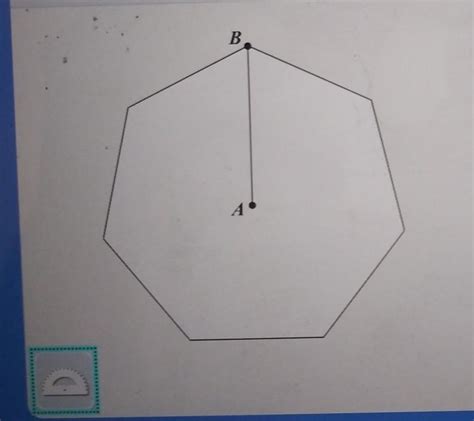
Table of Contents
Mastering Rotations: A Comprehensive Guide to Using a Protractor
Using a protractor to determine the angle of rotation is a fundamental skill in geometry and various other fields. This comprehensive guide will walk you through the process, explaining the theory behind rotations and providing practical examples to solidify your understanding. We'll cover different scenarios, including rotations around the origin and rotations around arbitrary points.
Understanding Rotations
Before diving into protractor usage, let's establish a clear understanding of rotations. A rotation is a transformation that turns a figure around a fixed point called the center of rotation. This transformation preserves the shape and size of the figure, only changing its orientation. The rotation is defined by two key elements:
- The center of rotation: The point around which the figure rotates.
- The angle of rotation: The amount of rotation, measured in degrees. A positive angle indicates counterclockwise rotation, while a negative angle indicates clockwise rotation.
Using a Protractor: The Basics
The protractor is a crucial tool for measuring angles. To accurately determine the angle of rotation using a protractor, follow these steps:
-
Identify the Center of Rotation: Clearly mark the center of rotation on your diagram. This is the point around which the figure is rotated.
-
Choose a Reference Point: Select a point on the original figure. This point will be used to track the rotation.
-
Locate the Corresponding Point: Identify the corresponding point on the rotated figure. This is the point where the reference point ends up after the rotation.
-
Align the Protractor: Place the protractor's center mark on the center of rotation. Align the protractor's 0° mark with the line segment connecting the center of rotation and the reference point.
-
Measure the Angle: Read the angle measurement where the line segment connecting the center of rotation and the corresponding point intersects the protractor's scale. Remember to note whether the rotation is clockwise (negative angle) or counterclockwise (positive angle).
Example 1: Rotation around the Origin
Let's consider a simple example. We have a point A(2, 3) that is rotated around the origin (0, 0) to a new point A'( -3, 2). To find the angle of rotation:
-
Plot the points: Draw the coordinate axes and plot points A and A'.
-
Draw lines: Draw lines from the origin (0,0) to points A and A'.
-
Use the protractor: Place the protractor's center on the origin (0,0). Align the 0° mark with the line segment OA. Measure the angle between OA and OA'. You'll find that the angle is 90° counterclockwise.
Therefore, the rotation is 90° counterclockwise. You can confirm this using trigonometry as well. The coordinates of A'( -3, 2) suggest a 90° rotation from A(2,3).
Example 2: Rotation around an Arbitrary Point
Rotations aren't always centered on the origin. Let's say we rotate a triangle ABC around point P (4, 2). Point A (1, 1) is rotated to A' (7, 1), Point B (3, 5) is rotated to B'(3, -1), and point C (5, 3) is rotated to C'(5, -3).
-
Plot the points: Plot points A, B, C, P, A', B', and C'.
-
Connect points: Draw lines from point P to A, B, C, A', B', and C'.
-
Use the protractor: Using the protractor, measure the angle between PA and PA', PB and PB', and PC and PC'. You'll find that each angle is approximately 180°.
Therefore, the rotation is 180° around point P.
Advanced Scenarios and Considerations
While the above examples illustrate basic applications, real-world scenarios can be more complex. Here are some additional points to consider:
-
Negative rotations: Remember that clockwise rotations are represented by negative angles.
-
Rotations beyond 360°: Rotations can exceed 360°. For instance, a 450° rotation is equivalent to a 90° rotation.
-
Accuracy: The accuracy of your measurement depends on the precision of your protractor and your drawing skills. Use a protractor with fine markings for greater accuracy.
-
Software Tools: For more complex rotations or situations requiring higher precision, consider using geometry software or CAD programs. These tools offer digital protractors and other helpful features.
-
Transformations Combined: Often, transformations are combined. For example, a rotation might be followed by a translation or reflection. Understanding the order of operations is crucial. For instance, a 90° rotation followed by a translation is different from a translation followed by a 90° rotation.
Real-World Applications
Understanding rotations and mastering the use of a protractor has wide-ranging applications across various disciplines:
-
Engineering: In mechanical engineering, understanding rotations is crucial for designing gears, linkages, and robotic mechanisms.
-
Computer Graphics: Rotations are fundamental in computer graphics, used for creating animations, video games, and 3D modeling.
-
Architecture and Design: Architects and designers utilize rotations to create aesthetically pleasing and structurally sound buildings.
-
Physics: Rotational motion is a significant concept in physics, playing a role in understanding the movement of celestial bodies, gyroscopes, and rotating machinery.
Troubleshooting and Tips for Success
-
Double-check your measurements: It's easy to make mistakes when measuring angles. Always double-check your measurements to ensure accuracy.
-
Use a sharp pencil: Sharp lines make for more accurate measurements.
-
Draw clear diagrams: A clear diagram will make it easier to identify the center of rotation, reference points, and corresponding points.
-
Practice: The best way to master using a protractor for determining rotations is to practice regularly. Start with simple examples and gradually move on to more complex ones.
Conclusion:
Determining the angle of rotation using a protractor is a fundamental skill with broad applications. This comprehensive guide provides a step-by-step approach, covering both basic and advanced scenarios. By understanding the underlying principles of rotations and practicing the techniques described, you'll be well-equipped to tackle any rotation-related problem effectively. Remember to always practice your skills to enhance your accuracy and efficiency. The more you practice, the easier and more intuitive this process will become. The combination of clear understanding, practical application, and consistent practice is the key to mastering the art of using a protractor for determining rotations.
Latest Posts
Latest Posts
-
The Term For Pertaining To The Sun Is
Mar 18, 2025
-
Jack And Jill Exercise In A 25 0 M Long Swimming Pool
Mar 18, 2025
-
Which Of The Following Is True About Corporations
Mar 18, 2025
-
Which Letter Correctly Identifies The Part Of The Hydrologic Cycle
Mar 18, 2025
-
Management Is More Progressive Today There Is More Emphasis On
Mar 18, 2025
Related Post
Thank you for visiting our website which covers about Use The Protractor To Determine Which Of The Following Rotations . We hope the information provided has been useful to you. Feel free to contact us if you have any questions or need further assistance. See you next time and don't miss to bookmark.
