Split The Worksheet Into Panes At Cell D16
Holbox
Mar 17, 2025 · 5 min read
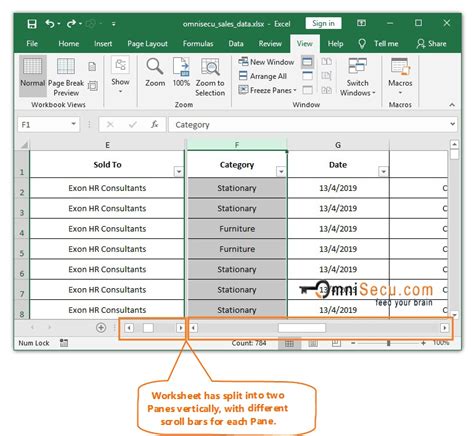
Table of Contents
Splitting Worksheets into Panes at Cell D16: A Comprehensive Guide
Splitting a worksheet into panes is a powerful feature in spreadsheet software like Microsoft Excel and Google Sheets that allows you to view different sections of your data simultaneously without scrolling. This is incredibly useful for large datasets, complex spreadsheets, or when you need to compare information across different parts of your worksheet. This article will comprehensively guide you through splitting your worksheet into panes, specifically at cell D16, covering various scenarios and techniques.
Understanding Worksheet Panes
Before diving into the specifics of splitting at D16, let's understand the fundamental concept of worksheet panes. Think of it as dividing your worksheet into separate, independent viewing areas. Each pane can scroll independently, allowing you to work on one section of your data while keeping another section visible for reference. This significantly improves efficiency and reduces the need for constant scrolling.
Splitting the Worksheet at Cell D16: Step-by-Step Guide (Microsoft Excel)
In Microsoft Excel, the process is straightforward:
Step 1: Navigate to Cell D16
First, ensure your cursor is positioned on cell D16. This is the crucial point where the split will occur.
Step 2: Locate the Split Button
Look for the "Freeze Panes" button in the "View" tab. This button is typically located in the "Window" group. While it might seem counterintuitive to use the "Freeze Panes" button for splitting, it's the tool that also allows you to create split panes.
Step 3: Splitting the Worksheet
Instead of clicking the "Freeze Panes" button directly, hover your mouse cursor over it. You will see a small dropdown arrow; click on it. You’ll see a few options, but the key option is "Split".
Important Note: Alternatively, you can manually split the panes. Click on the "Split" button within the "Window" group. You can find it by clicking the small downward facing arrow in the "Freeze Panes" button. The spreadsheet will be split at the row and column where your cursor is located, which in this case, should be cell D16.
Step 4: Adjusting the Panes
Once the split is created, you can adjust the size of each pane by dragging the split bars. These split bars appear as dark lines where the panes meet. Place your cursor over the split bar; the cursor will change to a double-headed arrow. Click and drag to resize the panes according to your preference.
Splitting the Worksheet at Cell D16: Step-by-Step Guide (Google Sheets)
Google Sheets provides a slightly different approach but achieves the same outcome:
Step 1: Navigate to Cell D16
Similar to Excel, position your cursor on cell D16 before initiating the split.
Step 2: Using the "Freeze" Feature (A Workaround)
Google Sheets doesn't have a direct "Split" option like Excel. However, you can achieve the desired result by utilizing the "Freeze" feature strategically.
First, you need to freeze the panes. Go to "View" and select "Freeze". Choose "Freeze at row 16" to freeze all rows above row 16. This will essentially create the upper pane. Now to the left, it's best to freeze column D. So, from the same menu, choose "Freeze" and select "Freeze at column D". This way you will have a proper splitting at the cell you prefer.
Step 3: Independent Scrolling
After freezing the panes, you'll notice that each section scrolls independently. This is functionally equivalent to having split panes.
Advanced Techniques and Considerations
Multiple Splits
You're not limited to a single split. You can create multiple splits to divide your worksheet into several independent scrolling sections in both Excel and Google Sheets. This is incredibly useful for managing very large or complex datasets. Just repeat the process from different cells.
Removing the Split
To remove a split, simply double-click on any of the split bars. This will remove the split and return your worksheet to a single, continuous viewing area. In Google Sheets, unfreezing the panes will achieve the same result.
Optimizing for Data Analysis
Splitting panes is particularly effective when analyzing data. You can keep a summary table in one pane and the detailed data in another, easily referencing them side-by-side.
Working with Large Datasets
For massive datasets that exceed the screen's capacity, splitting the worksheet is a necessity. It allows you to focus on specific sections while maintaining context by keeping other relevant data in view.
Improving Workflow Efficiency
By strategically splitting your worksheet, you can significantly streamline your workflow. This is crucial for tasks involving repetitive comparisons or data manipulation across different sections of your spreadsheet.
Troubleshooting Common Issues
Inability to Split
If you cannot split your worksheet, ensure that your cursor is positioned correctly on cell D16 before attempting the split. Also, check if your worksheet is protected, which might restrict modification.
Unexpected Split Behavior
If the split doesn't appear as expected, double-check your steps and try again. Sometimes, accidental clicks can interfere with the process.
Split Bar Disappearance
If the split bars disappear, it usually means the split has been accidentally removed. Repeat the process to recreate the split.
Best Practices for Splitting Worksheets
- Plan Your Split: Before splitting, consider which data sections need to be visible simultaneously.
- Adjust Pane Sizes: Resize panes to optimize the viewing area for each section of your data.
- Use Multiple Splits: Don’t hesitate to use multiple splits for complex scenarios.
- Remove Unnecessary Splits: Remove splits when they are no longer needed to keep your worksheet organized.
Conclusion
Splitting your worksheet into panes at cell D16, or at any other location, provides a significant advantage for managing and analyzing data within spreadsheets. This simple yet powerful technique enhances productivity and makes working with large or complex datasets much more efficient. Mastering this skill improves data analysis and empowers users to navigate spreadsheets more effectively. Remember to practice and experiment with different splits to find what works best for your specific workflow and data visualization needs. By understanding the techniques and considerations outlined above, you'll become proficient in leveraging this valuable tool to its full potential.
Latest Posts
Latest Posts
-
A Backup Of Sewage In The Operations Dry Storage Area
Mar 17, 2025
-
An Air Filled Parallel Plate Capacitor
Mar 17, 2025
-
Report For Experiment 9 Properties Of Solutions Answers
Mar 17, 2025
-
Write A Tragic Six Line Poem About Music
Mar 17, 2025
-
Determine The Equation To Be Solved After Removing The Logarithm
Mar 17, 2025
Related Post
Thank you for visiting our website which covers about Split The Worksheet Into Panes At Cell D16 . We hope the information provided has been useful to you. Feel free to contact us if you have any questions or need further assistance. See you next time and don't miss to bookmark.
